


Sending GatorMail Campaigns
Marketing Campaigns can contain multiple Mailshots as part of the same campaign, as well as handle activities such as Events and webinar registrations. You can track the progress of Leads and Opportunities generated by each Campaign, to measure performance and understand your return on investment (ROI).
The video below demonstrates how to create a GatorMail Campaign from a Mailshot in Workbooks. Written instructions can also be found further down the page.
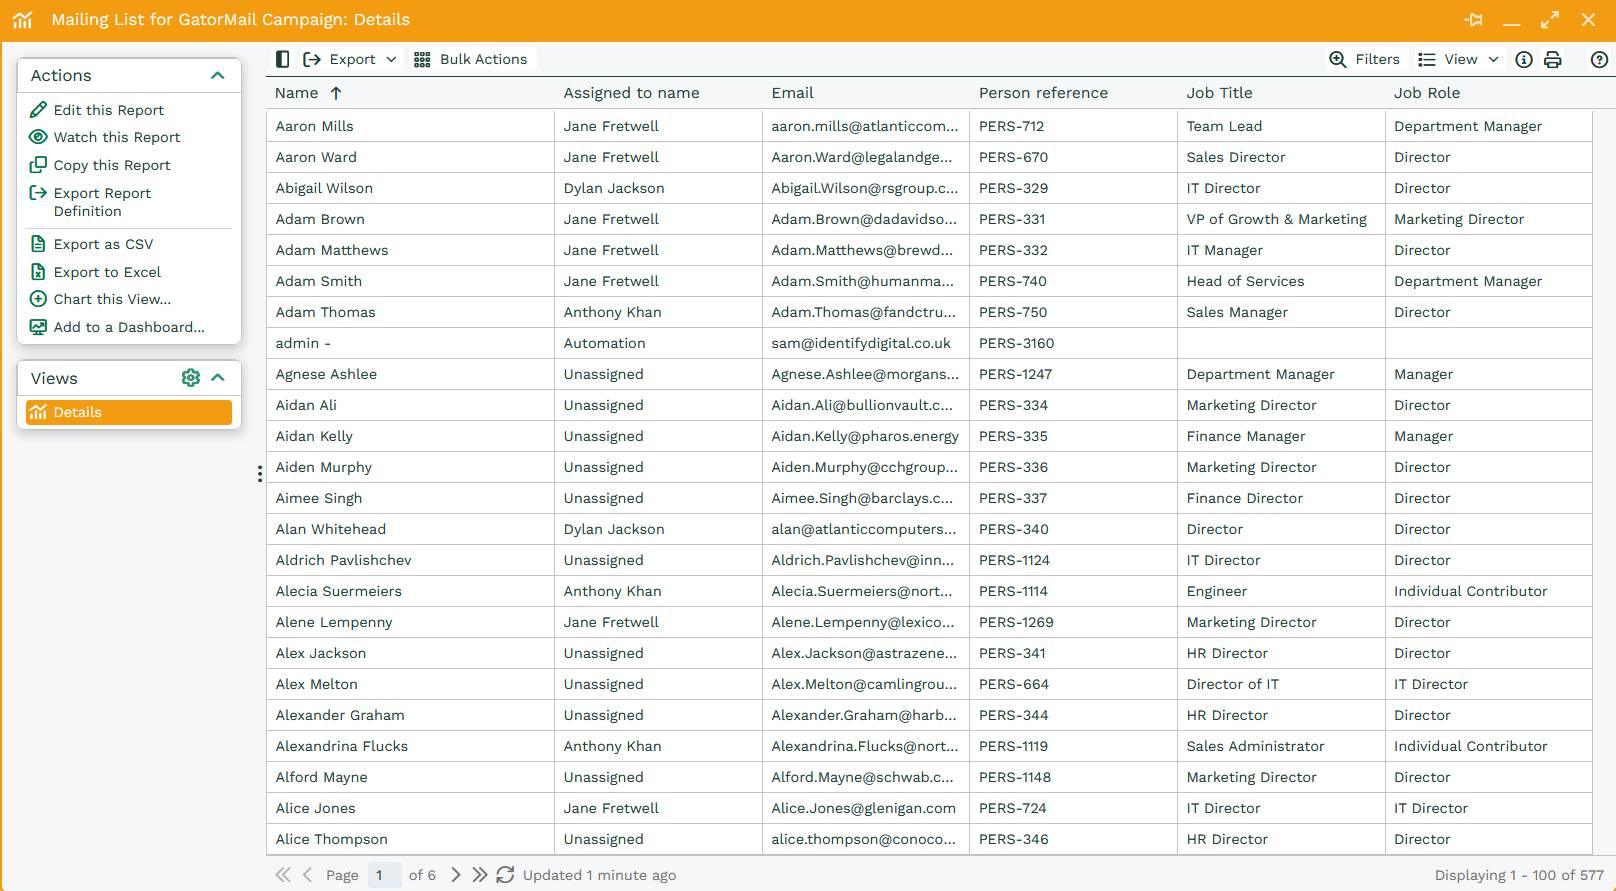
Stage 1 - Build a Report for a Mailing List
Using Reports to build your audiences allow your Mailing Lists to stay dynamic and up to date. For example, if you want to email people who haven’t been contacted in the last month, a static list (adding members manually), could still include people who may have been contacted between setting up the Campaign and sending it.
By using a Dynamic Mailing List, People are automatically added or removed based on your Report criteria, ensuring the list is always up to date.
All reports must be based on Sales Leads or People records, as these are the only record types that can be contacted through our Mailshot integrations.
Tip
Although it's possible to build a Mailing List and send Campaigns to Sales Leads, we recommend only marketing to People. Marketing to Sales Leads often delivers poor results. It can waste time and budget on prospects who aren't ready to engage, lead to low conversion rates and can cause misalignment between Sales and Marketing teams. Unsolicited emails may turn prospects away, and investing heavily in nurturing cold leads rather than qualifying or handing them over to sales, can increase the overall cost of acquisition.
Using Reports also allows for a greater level of segmentation of data as criteria can be applied to any Custom Field or use Calculated Columns in order to only include the most relevant people in your database.
Reports can be as simple as including a Person’s Name, Email address and a criteria that their Email Opt out is False. Alternatively, they can be more advanced, such as automatically adding people to a Mailing List after a set period of time following the opening of your first email.
Stage 2 – Create a Mailing List
Once you’ve set up your Report, you can then add this to a new Mailing List to be used in your Campaign. From Start > Marketing > Mailing Lists > New Mailing List:
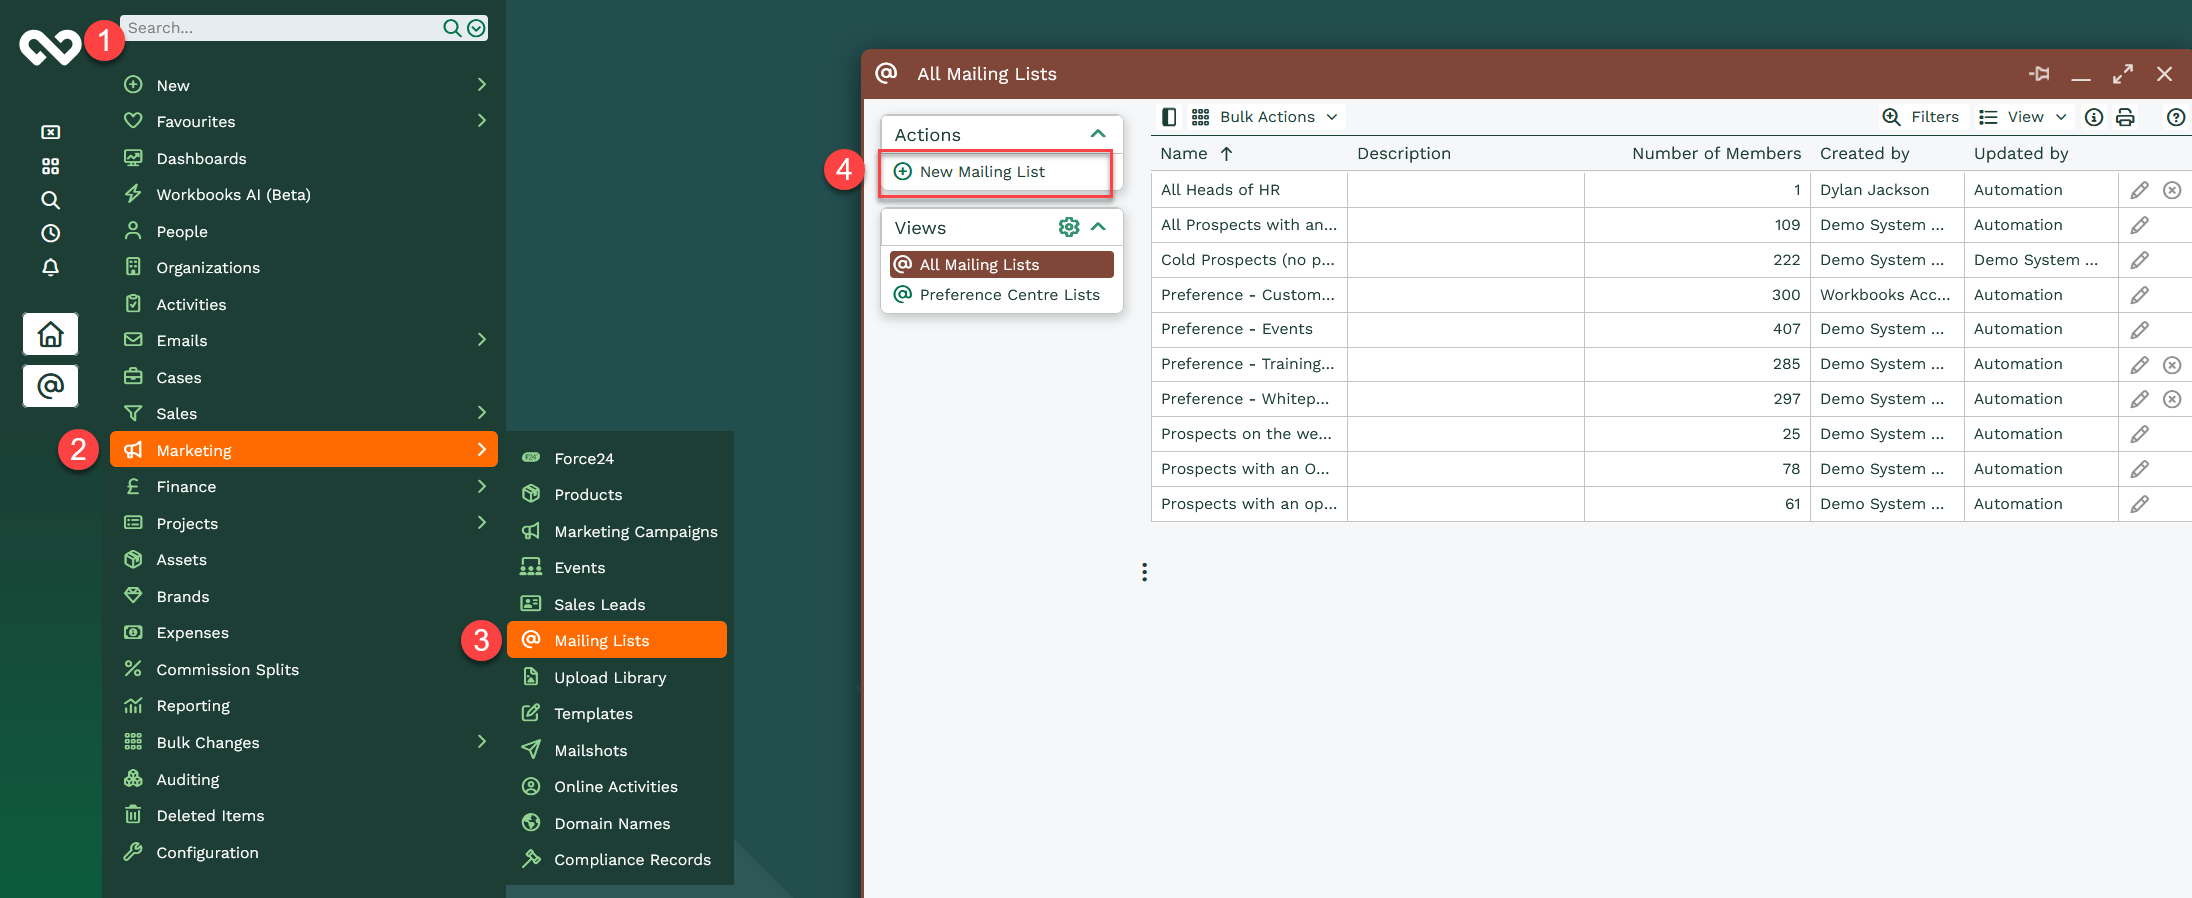
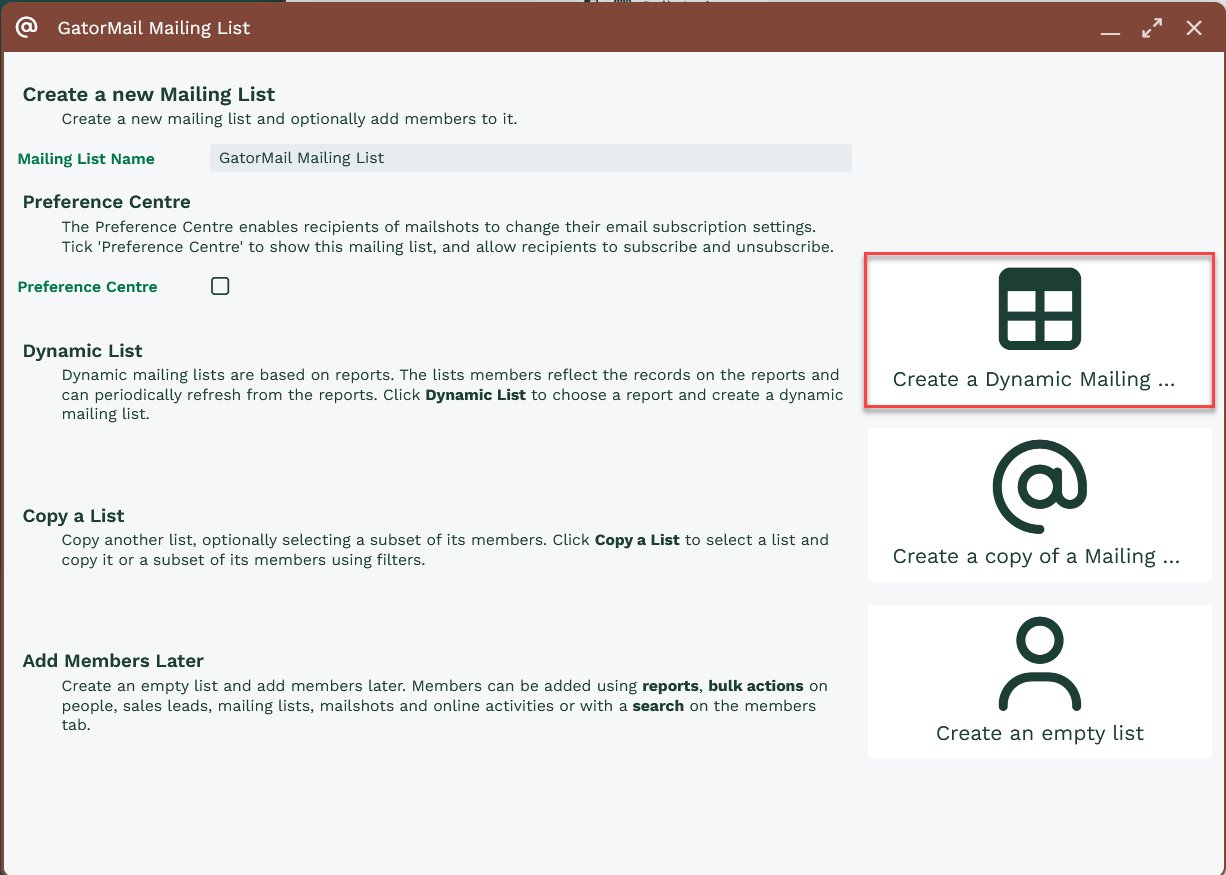
Add a name for your Mailing List and select Create a Dynamic Mailing List
Select the Report and View you want to use to add the Mailing List Members. You’ll also need to specify which Column will be used to identify each Member. This can be the Person Name or Person Reference. Once this has been done,
Tip
We recommend using the Person Reference as a unique identifier, as it's possible to have two Mailing List Members with the same name.
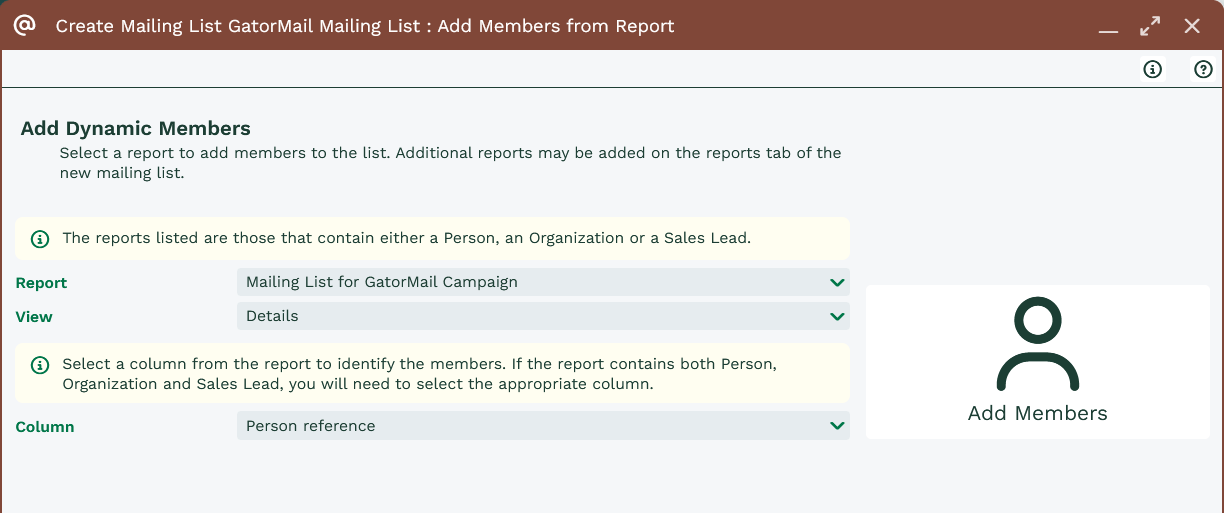
Next, select, Add Members. Your Mailing List is now set up and the Members and Reports have been added.
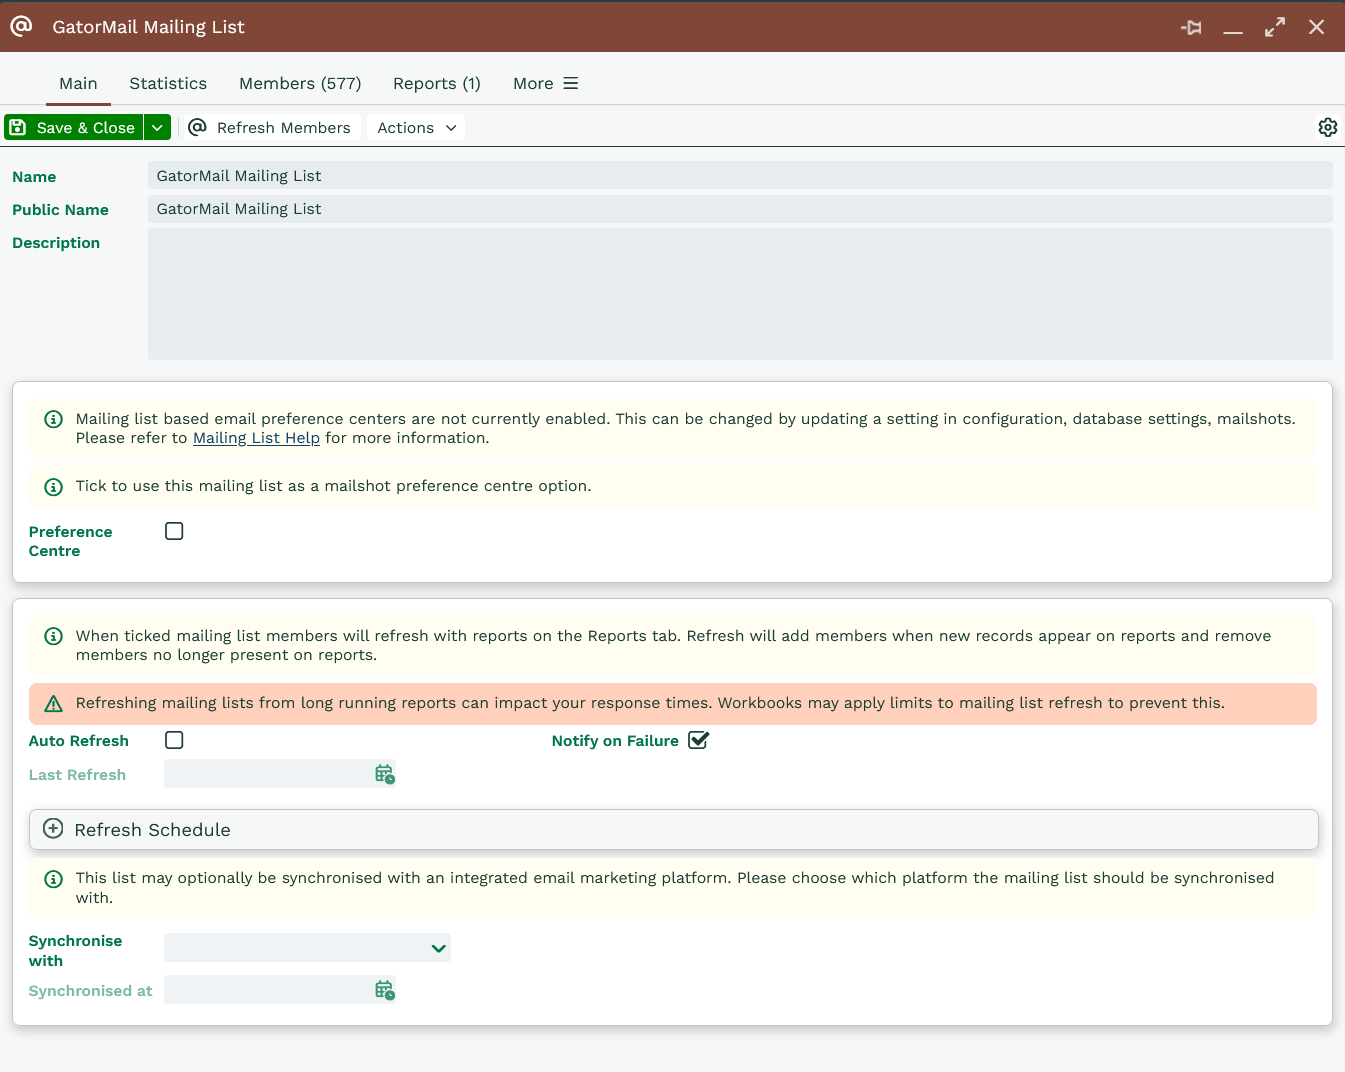
You can add more than one Report to a Mailing List by selecting the Reports tab > Add Report. You can add as many additional Report Views as you require for the Mailing List.
As the Mailing List is dynamic, the Members tab will refresh automatically based on the Refresh Schedule. By default, this is set for 6AM every day, removing any Members that no longer meet the criteria of the Report and adding any new Members that have met the criteria of the Report.
You may want to adjust the Refresh Schedule depending on the type of Campaign you’re running. For example, if you’re sending emails shortly after someone downloads marketing material from your website, you may want to refresh the Mailing List every few minutes. Alternatively, if you’re sending a monthly newsletter, you may only need it to refresh the list once a month before the newsletter goes out.
Stage 3 - Add Mailing List to a Workbooks Campaign
Once you’ve created your Mailing List, you can either create a new Campaign or add the Mailing List to an existing one. While GatorMail doesn’t require a Campaign to sync a Mailshot, we still recommend using one, as it allows you to track all marketing activity in a single place.
If you’re sending multiple Mailshots, you’ll also be able to review the overall success of the email series, as well as the individual success of each Mailshot.
Once the Campaign’s been created, go to the Mailing Lists tab > Add Mailing List and add the Mailing List and Member status for the Campaign.
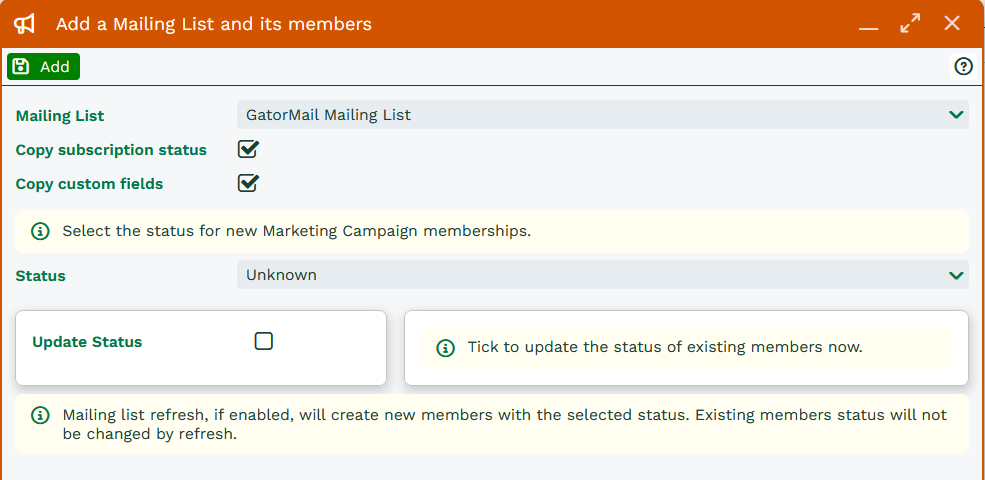
Following this, your Campaign Members should refresh and be added to the Members tab of the Campaign.
Stage 4 – Create the Mailshot
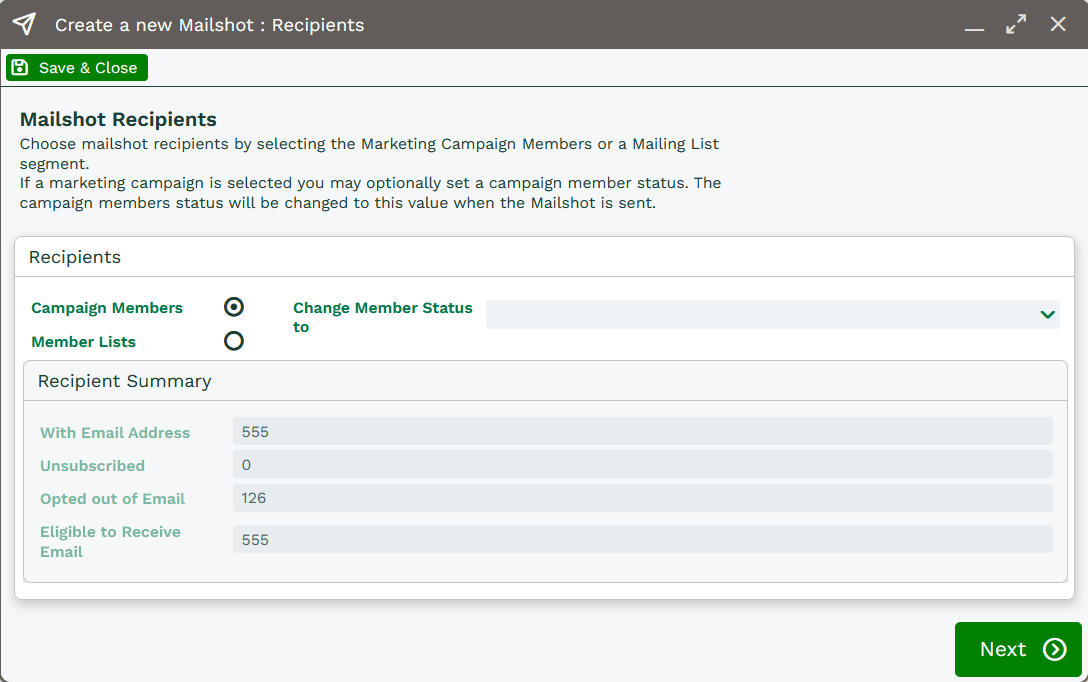
A GatorMail Mailshot can be created directly from the Campaign. On the Mailshots tab > select New Mailshot > New GatorMail Mailshot. On the next step of the Wizard you will be asked if you want to add Campaign Members or Member Lists.
Adding Campaign Members allows you to segment Members across all Mailing Lists on the Campaign. This method is limited, as you’ll only be able to filter Members on criteria set on either Standard Fields or Indexed Custom Fields.
You can then set the Member Status of the Mailshot and move on to the next stage.
Alternatively, adding Member Lists instead gives you the option to add an entire Mailing List to the Mailshot. We recommend this option, as all filters and criteria for who should receive the Mailshot should already be defined when setting up the report.
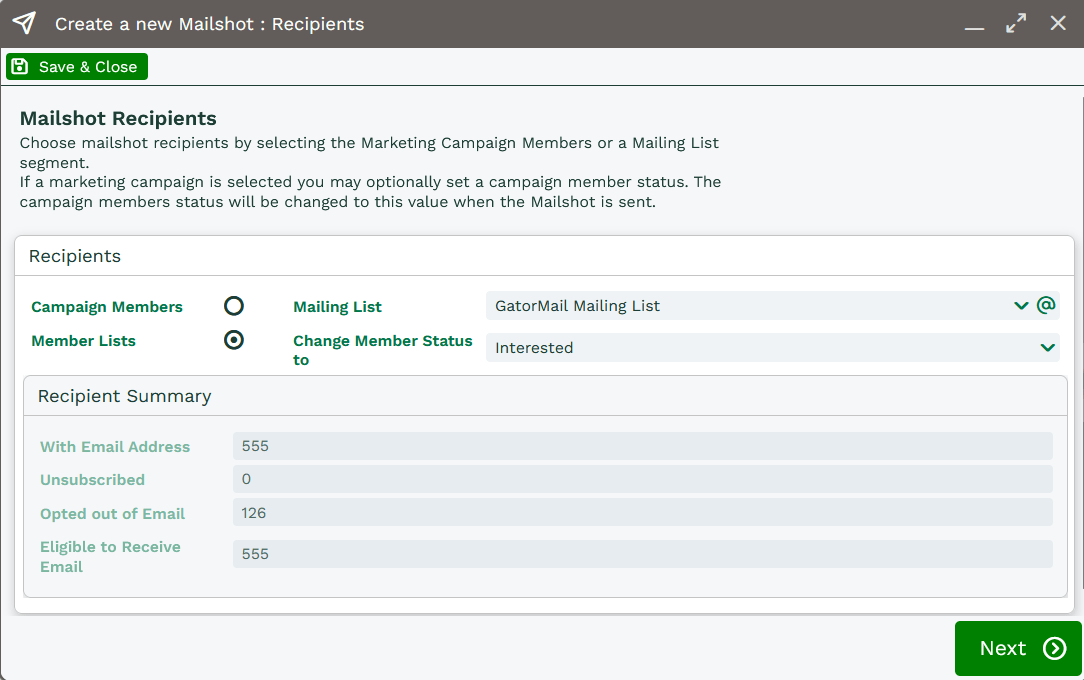
Selecting this option also lets you apply the same filters and criteria available through the Campaign Members view. This means you can further refine your audience if required before sending.
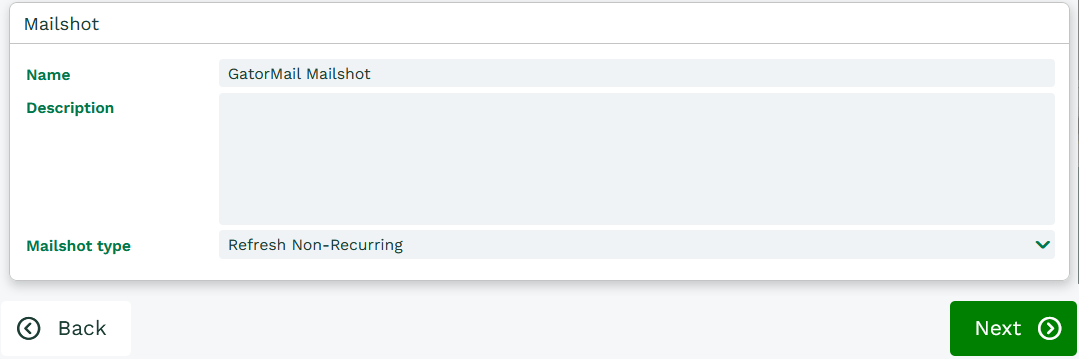
Once done, you’ll need to give your Mailshot a Name, Description and Type. GatorMail Mailshot Types are as follows:
Static – The Mailshot is initiated once only for the recipients available at the time the mailshot is run.
Refresh Recurring – The Mailshot will continue to be run with an interval set in weeks / months (Recurring) and new recipients, added after the mailshot is initiated; who meet the selection criteria or are included in the group, will receive the mailshot as it recurs (Refresh).
Refresh Non-Recurring – The Mailshot is initiated once only for each recipient. New recipients, added after the mailshot is initiated, who meet the selection criteria or are included in the group, will receive the mailshot (refresh) once only.
Static Recurring – The Mailshot will continue to be run with an interval set in days (Recurring) for the recipients available at the time the mailshot is initiated.
Campaign Series / Workflow – The Mailshot is going to be part of a Series or a Workflow and therefore will not have recipients attached to it.
The table below provides more guidance on the difference between the available Mailshot types:
| Mailshot Type | On First Launch … | On Future Launches … | Launch Schedule | Example Use Case |
|---|---|---|---|---|
| Static | Send to all matching records (that matched at the time of the sync unless auto refresh is enabled) | N/A | Determined within the Spotler Campaign | New Product/Service, Newsletter |
| Refresh Recurring | Send to all matching records | Send to all matching records, regardless if they’ve been included previously | Determined within the Spotler Campaign | Points / Statement Email |
| Refresh Non-Recurring | Send to all matching records | Send to all matching records excluding anyone previously included | Determined within the Workbooks Mailshot Refresh schedule | New User Campaign |
| Static Recurring | Send to all matching records (that matched at the time of the sync) | Will only send to the original matching target group, regardless of new matching records | Determined within the Spotler Campaign | Special Offer Group |
| Campaign Series / Workflow | Used as a campaign within Smart Forms / Workflow (audience is NOT USED OR SYNCHRONISED) | N/A | Determined by Smart Form rules / Workflow | Sent when Smart Form is submitted |
For most Mailshots, we recommend using Refresh Non-Recurring. This is keeps your Member List refreshed inline with your Mailing List based on the Refresh Schedule, until the Mailshot is sent from GatorMail, and each recipient will only receive the email once.
Stage 5 - Finalizing your Mailshot
While your Mailshot is still in a draft state, you can make changes before synchronizing it with GatorMail. The main changes you may want to make at this stage are the Mailshot Name and the Mailshot Type. Once synchronized, these settings can’t be amended.
Once you’re happy with the Mailshot, you’ll need to press the Synchronize button at the top of the Mailshot to initiate the Sync into GatorMail.
Note
The name of the Mailshot cannot exceed 100 characters or contain any unusual characters or symbols. These could cause the Mailshot to get stuck and not sync to Gator.
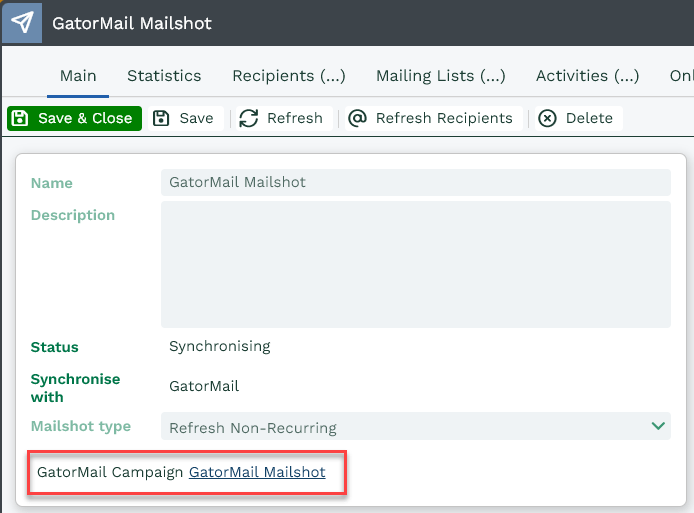
Syncing the Mailshot to Spotler can take a few minutes to complete. Once Synchronized, a link will appear on your Mailshot that will take you directly to the Campaign setup in GatorMail. You’ll also receive a notification in line with your Notification Settings when this has been completed.

Reloading the Mailshot will now show the Link to the Campaign.
Within the GatorMail, on the Campaigns screen, select your newly created Campaign and you’ll have various settings to complete such as: Campaign Type, Send Schedule, the Sending and Reply Domain, Preference Centre etc.
You also have another chance to review the Campaign Audience on the second stage, Set and Review the Email creative, perform a Quick test or Full Campaign test and finally initiate the Campaign.
Stage 6 - Online Activities
Once a Mailshot has been sent from GatorMail, you’ll be able to review all of the send statistics from the Mailshot in Workbooks.
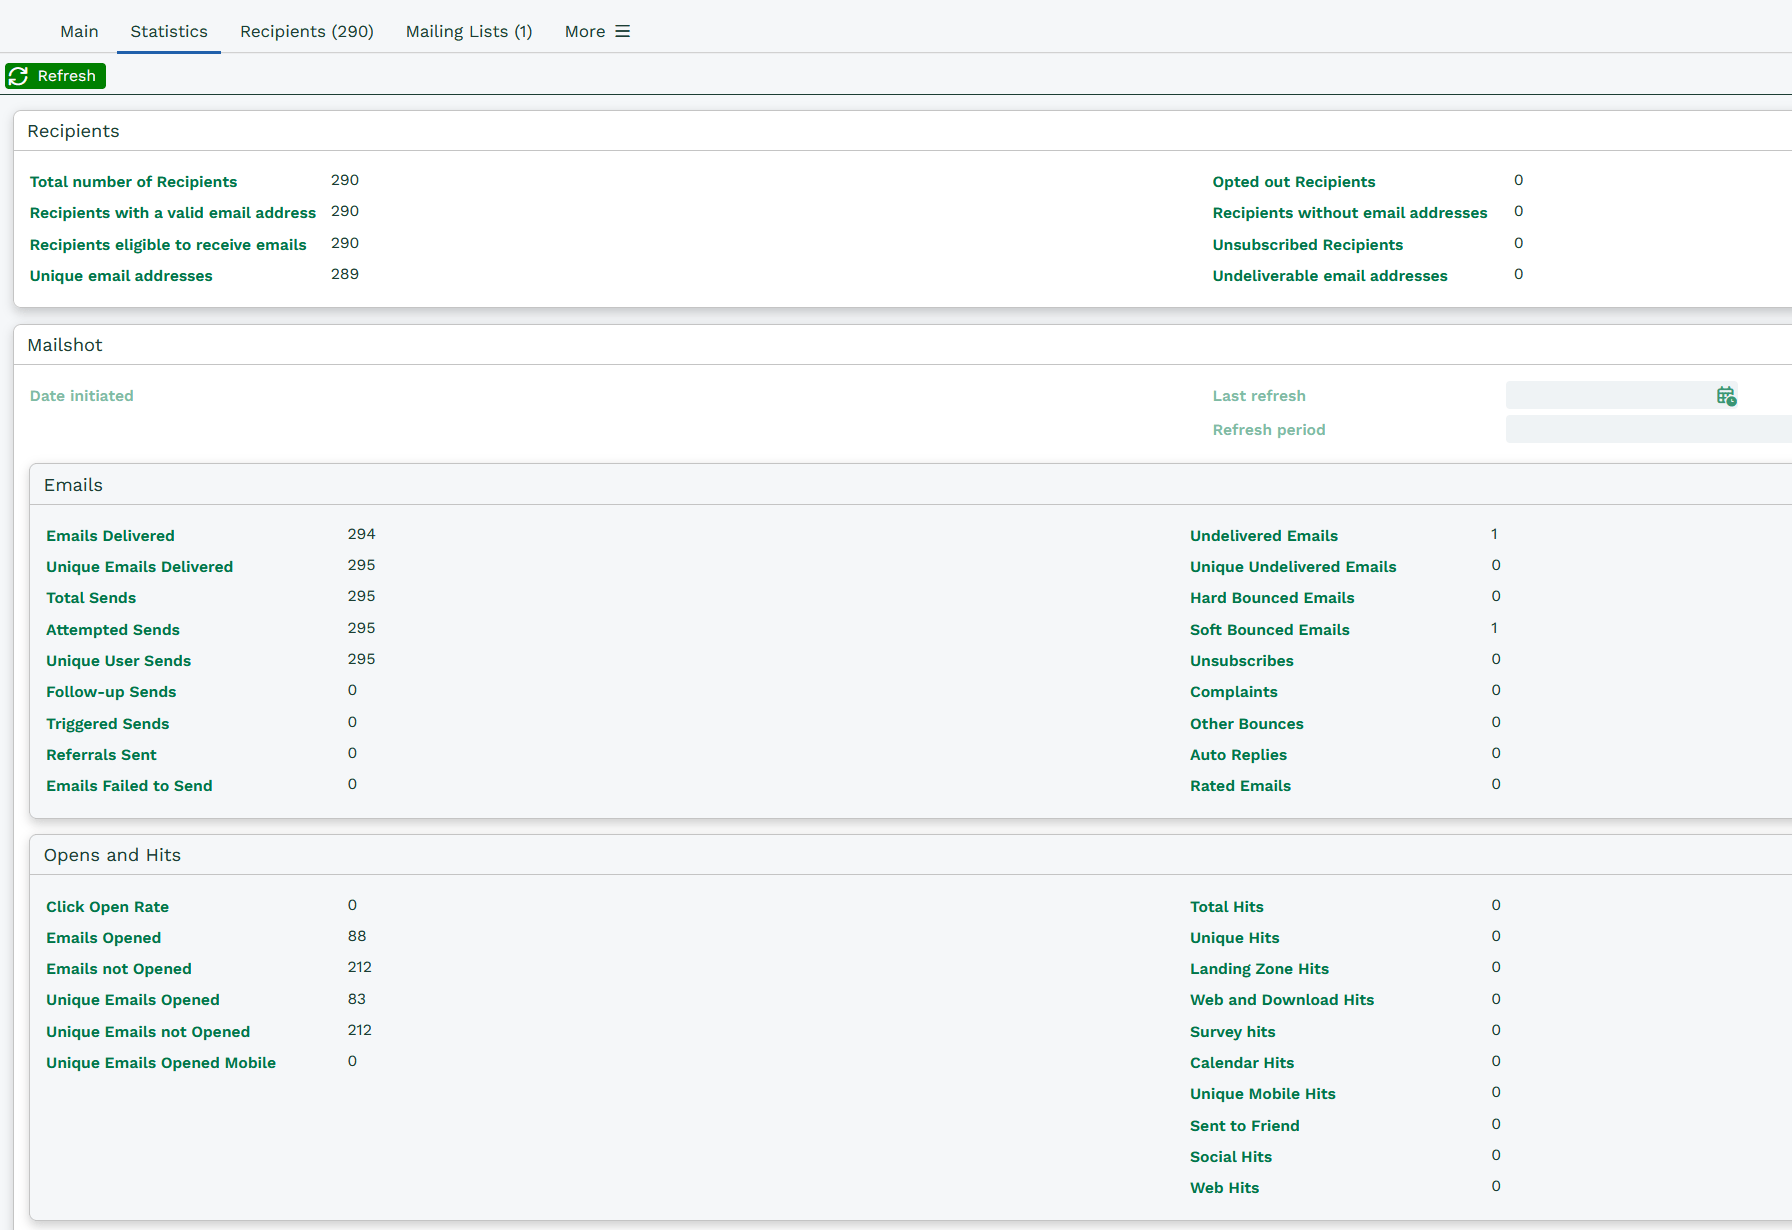
Additionally, Online Activities are created within Workbooks for every action taken within the Mailshot, including Sent, Opens, Click throughs and Unsubscribes. These will all appear on the Online tab of the Campaign and Mailshot, allowing you to review each individual Mailshot as well as the Campaign.
Online Activities can be reported on and used to drive follow‑up Mailshots, as well as to measure the overall performance of a Campaign or Mailshot.