Knowledgebase articles
- Welcome to the Knowledge Base
- Introduction
- Workbooks Support: Your Go-To Guide
- Getting Started
- Preferences
- Activities
- Cases
- Introduction to Cases
- Displaying & Adding Cases
- Managing Cases
- Using the Case Portal
- Email
- Importing Data
- Leads
- Marketing
- Introduction to Marketing
- Event Management
- Compliance Records
- Spotler Integration
- What is Spotler?
- Navigating your Spotler homepage
- Introduction to GatorMail
- GatorMail Configuration
- Sending Emails in GatorMail
- Advanced Features
- Setting up the Plugin
- Viewing Web Insights Data on your Form Layouts
- Domain Names and Online Activities
- Reporting incorrect Leads created through Web Insights
- Reporting on Web Insights data
- Using UTM Values
- Why aren’t Online Activities being created in the database?
- Why is GatorLeads recording online activities in a foreign language?
- GatorSurvey
- GatorPopup
- Integrations
- SFTP/FTP Processes
- Mapping
- Docusign Integration
- DocuSign Functionality
- Adobe Sign Integration
- Zapier
- Introduction to Zapier
- Available Triggers and Actions
- Linking your Workbooks Account to Zapier
- Posted Invoices to Xero Invoices
- Xero payments to Workbooks Tasks
- New Case to Google Drive folder
- New Case to Basecamp Project
- New Workbooks Case to JIRA Ticket
- Jira Issue to new Case
- 123FormBuilder Form Entry to Case
- Eventbrite Attendee to Sales Lead and Task
- Facebook Ad Leads to Sales Leads
- Wufoo Form Entry to Sales Lead
- Posted Credit Note to Task
- Survey Monkey responses to Tasks
- Multistep Zaps
- Email Integrations
- Microsoft Office
- Auditing
- Comments
- People & Organisations
- Introduction to People & Organisations
- Using Postcode Lookup
- Data Enrichment
- Reporting
- Transaction Documents
- Displaying & Adding Transaction Documents
- Copying Transaction Documents
- Transaction Documents Fields Help
- Transaction Documents Line Items Help
- Printing & Sending Transaction Documents
- Managing Transaction Document Currencies
- Managing Transaction Document Statuses
- Setting a Blank Default Currency on Transaction Documents
- Credit Notes
- Customer Orders
- Invoices
- Quotations
- Supplier Orders
- Sagelink
- Configuration
- Releases & Roadmap
Snippets
Introduction
NOTE: In order to use Snippets, Users must have the Modify and View Email Templates capabilities. Please contact your System Administrator for more information.
Snippets are blocks of rich text that can be created and applied to new emails so that Users can create a tailored, reliable, and standardised format for your outbound communications. This functionality will make sending out emails quicker and easier for your Users, alongside ensuring that your brand’s voice remains consistent across your business.
Using Snippets
Once you have created your Snippet, it will appear in the Email Assistant when you next go to write an email (providing the Form Layout categories align) in the ‘Snippets’ section. You can see a preview of what your email will look like with the Snippet added to it by clicking the eye icon, and if you’d like to apply the Snippet you can either click Apply on the preview, or click on the Snippet’s name within the Email Assistant:

Creating Snippets
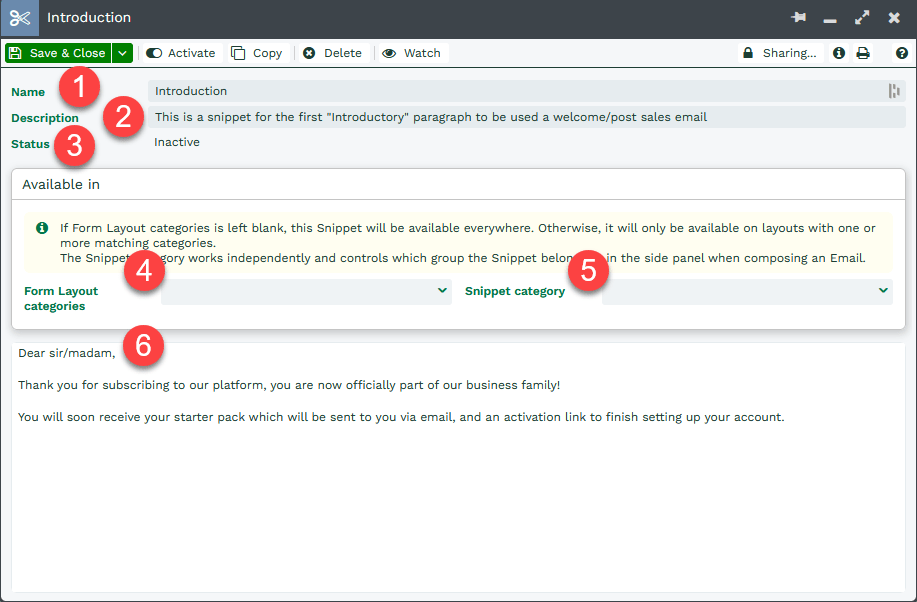
To create a new Snippet, go to Start > Emails > Snippets and click ‘New Snippet’ in the top left of the Landing Page. A Snippet is composed of six parts, as detailed below.
- Name – The name of your Snippet.
- Description – A brief description of the purpose of the Snippet; this will be visible in the Email Assistant when you hover over the Snippet’s name.
- Status – Snippets must be Active in order for them to be displayed in the Email Assistant when writing a new email.
- Form Layout Categories – Limit the visibility and usage of the Snippet by specifying a Form Layout category. The Snippet will then only appear as an option on emails that have the same category.
- Snippet Category – This will help identify the Snippet’s purpose by grouping it with other Snippets with the same category within the Email Assistant.
- Body – This is what will be pulled into your email when you select the Snippet in the Email Assistant. This is a rich-text field, and therefore supports images and text effects such as bold, underlined, and italics.
